Author Archives: lookinatmycookin

Cooking With Rapeseed Oil

  Rapeseed Oil – Seriously Healthy!

Ever since I took an active interest in cooking as a serious hobby, I have trained myself to believe that extra virgin olive oil is simply the best thing to cook with. After all, a recent study showed that a diet of nuts and olive oil can help prevent dementia in older age, and I’ve never met an elderly person while visiting the Mediterranean that didn’t swear by the stuff. However, while this is all well and good, and while olive oil is indeed healthy for the mind and delicious when used as a salad dressing, when it comes to hardcore cooking as a whole, it could be doing us more harm than good.

While sunflower oil and vegetable oil were once pushed aside for healthier olive oil, these days, it is more common to find heath practitioners and dieticians pushing something called rapeseed oil. Rapeseed oil is made from those bright yellow flowers that you see gracing fields in the British countryside every summer. Originally grown to provide lubricants for steam engines, the rapeseed flower was eventually altered to include varieties that contained less glucosinolates (that’s the thing responsible for that bitter taste in brussel sprouts), which was the reason it wasn’t first grown for human consumption.

These days the flower makes an oil which is much more palatable than its predecessor and one which is jam packed full of health benefits. It has a much higher smoke point than olive oil, making it far more suitable for roasting and frying. Not only that, but it can pump you full of some serious vitamins AND help to lower your cholesterol!

Some of the benefits of rapeseed oil are:

  • It contains the lowest saturated fat content of any oil – less than half that of Olive Oil.
  • It has 10 times more Omega 3 than Olive Oil.
  • It is a great source of Vitamin E.
  • It is high in monounsaturated fats.
  • It contains no artificial preservatives and is trans-fat and GM free.
  • It is suitable for a variety of diets – vegetarian, gluten-free, Kosher and Halal.
  • It is safe to cook at high temperatures with a burning point of 230c much higher than Olive Oil.

Since starting to use it about 10 months ago, I have seen a significant drop in my cholesterol level and have felt the benefit of the added Omega 3 several times over.

The price of rapeseed oil is significantly lower than that of olive oil as well, which just adds to its value. You can pick up a litre bottle in Aldi for £1.99 or a bigger bottle in Morrisons for the same price.

Next time you are buying oil at the supermarket, stop and think, can you afford NOT to try this great new alternative?

Categories: Quick post! | Tags: , , , | Leave a comment

Good Old Fashioned Onion Gravy

Old Fashioned Onion Gravy - perfect with mash!

Old Fashioned Onion Gravy – perfect with mash!

There is nothing better than a good roast beef dinner or pretty much anything involving sausages and mashed potato that will not benefit from a fantastic home made onion gravy, of course you may be a veggie (in which case substitute the beef stock for vegetable stock) who likes a good onion gravy with roasted vegetables, whoever you are though, this recipe should see you right.

Those keen eyed foodies out there will most likely have already noticed that I have already added this recipe to my blog along with a rather tasty Toad in the Hole recipe, as they pretty much go hand in hand, but here it is again anyway for those of  you who just want it for another dish, or who don’t like toads or the holes in which they like to reside.

INGREDIENTS

  • 1 tablespoons sunflower oil
  • 2 medium onions, peeled and sliced
  • 1 teaspoon soft brown sugar
  • 1 tablespoon plain flour (more if you want it thicker)
  • 500ml beef stock
  • Salt and pepper to taste

METHOD

  1. Soften the onions with the tablespoon of oil in a large non stick frying pan on a medium/low heat for about 15 mins, stirring often, until they are golden brown.
  2. Sprinkle in the sugar and cook for another 5 mins. Add a tablespoon of plain flour, then simmer, stirring constantly for 2 mins, so the onions are well coated and there is no dry flour left at all. Gradually pour in the stock a bit at a time, stirring well all the time to make a smooth sauce.
  3. Turn the heat up a little and allow the gravy to bubble and thicken for 4-5 mins, then season with salt and pepper to taste.
  4. Serve in a warmed gravy boat with a yummy dish for some ultimate comfort!
Categories: British Dishes, Sauces & Gravies | Tags: , , , , | 1 Comment

Grow You Own… Basil (Ocimum Basilicum)

Basil - The ultimate sunny window sill companion.

Basil – The ultimate sunny window sill companion.

Probably one of my favourite fresh herbs, along with Rosemary, is Basil (Ocimum Basilicum in Latin).  The smell, the colour, the taste, everything about it is just heavenly and it is the true King of Herbs! I use Basil in all sorts of dishes, I rip it up and put it in pasta sauces, sprinkle it on pasta dishes at the end of cooking, put whole leaves atop pizza, grind it up with some pine nuts to make pesto… it’s just so versatile, and so easy to grow!  All you need is a sunny garden, greenhouse or window sill and you are away.

I usually buy my Basil plants ready grown in a supermarket or garden centre, so I can use them straight away and still allow the plant to grow more leaves afterwards, you can grow it from seed of course, but this isn’t a gardening site, it’s a cookery site so I’m not going to go there! Typically, the kind of Basil you find find in supermarkets will be Sweet Basil, the type most commonly used in Italian cooking, but there are other types too, Thai, Lemon and Holy Basil, which are used in Asian cooking. And while you can buy ready picked basil leaves in packets, it’s definately a better option to spend 20-50p more on a whole plant.  Look for a plant that is bushy and is a beautiful vivid green colour and you can’t go wrong.

When you get it home, pop it into a flower pot and pop it in a sunny spot on a window still such as in the bathroom or more suitably, the kitchen.  Make sure you turn the plant every other day so the leaves down grow away from you, and keep it watered, it’s important to keep the plant from wilting so use a clean spray container and give the leaves a spritz once a day when you are watering the soil.

When it comes to using the actual Basil in a recipe, more often than not you will only need the leaves, take a pair of sharp scissors and cut in the middle of the stems of those which are yielding the largest leaves. This give the stem a chance to grow back and supply you with even more lovely leaves. You can dry it if you wish, take a few stems and after switching off the oven of an evening after dinner, just pop the stems inside as it is cooling, on a piece of tin foil, they will dry out as the oven cools down and by morning you will have some lovely fresh dried herbs for cooking with, just store them in an airtight jar.  Be warned though, Basil is prone to losing a lot of it’s flavour when it is dried and also when it is cooked, hence adding it towards the end of cooking.

You can tear it, or chop it, and either way you will immediately notice the pungent odour, it’s a lovely smell and one that you will find wafting around my kitchen on many a warm day!

So that’s Basil, a wonderful addition to any kitchen window sill…

Categories: Grow Your Own!, Herbs & Spices | Tags: , , , , , , , , , | 2 Comments

Quick Tomato Sauce

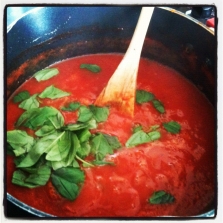
Quick Tomato Sauce - perfect for those Italian moments

Quick Tomato Sauce – perfect for those Italian moments

I know I’ve said before that I always use Dolmio tomato sauce in any pasta recipes I use, but I decided to go nuts and try my own, with truly fantastic results, this quick punchy sauce is just as good, if not better than anything in a jar! It goes well with anything needing a tomato sauce, meatballs, lasagne, spaghetti bolognese… the list is endless!

I have added a sprinkle of dried crushed chillies and even with only a little it does hit the taste buds, so if you don’t like heat then literally only add a pinch of chillies, more than that and your head will be on fire, especially if you don’t like hot food!!!

I use good quality tinned and peeled plum tomatoes and their juices because fresh is just so much more effort and hassle and there is nothing wrong at all with tinned tomatoes if they’re good quality or organic if you can get them. Fresh basil is also a must, don’t even bother trying to use dried, it’s not the same, DO however, use dried oregano! It just tastes better than fresh, but if you can do it, if you have the time, and if, like me, you do grow your own oregano, dry it out the day before and use it here.

This recipe will yield a serving for 4 or so people, that said, I made a bolognese sauce out of it today and I had a jar left over for another dish in the week! Try and keep some clean empty jars in the cupboards, you never know when you’ll need them!

INGREDIENTS

  • 1 medium onion, finely chopped
  • 1 clove garlic, finely chopped
  • 4 tablespoons extra virgin olive oil
  • 2 x 400g tins peeled plum tomatoes, blended until pureed
  • 1/4 teaspoon dried crushed chillies (more if you prefer)
  • Small handful of fresh basil leaves, torn into pieces
  • 1 heaped teaspoon dried oregano
  • 1/2 tablespoon balsamic vinegar
  • 1/2 tablespoon white caster sugar
  • Salt to season

METHOD

  1. On a medium/high hob, heat the olive oil in a medium sized saucepan and when hot, add the onion, garlic and chillies, stirring and frying gently until soft.
  2. Pour in the pureed tomatoes (I use the blender part of my food processor to get the job done but if you want chunkier sauce, then chopped the tomatoes by hand and make sure to keep the sauce from the tin to add to the sauce with the chopped tomatoes), stir in the oregano, vinegar and sugar and leave to simmer on a medium/low heat for about 10 minutes, stirring occasionally.
  3. Add salt to season, tasting as you go so you don’t overdo it, then add the torn basil leaves and stir them into the sauce.
  4. Remove from the heat and store or use as required.
Categories: Sauces & Gravies | Tags: , , , , | 3 Comments

Simple Seafood Sauce

Simple Seafood Sauce - just add prawns!

Simple Seafood Sauce – just add prawns!

Everyone loves a traditional prawn salad or prawn cocktail don’t they? Be it the middle of a hot summer or before the main course on Christmas day, it’s always a winner, but it just doesn’t taste right if it doesn’t have the best tasting seafood sauce on the top of it, and the jar mixes just don’t cut it a lot of the time. Some of the more expensive brands are pretty close, but the cheaper ones are downright horrible, tasting more of vinegar than tangy sweet seafood sauce just waiting to have a gang of prawns thrown in it!

The ironic thing is, this seafood sauce of mine has 5 measly ingredients in it, most of which you will have in your fridge or your cupboard, and if you don’t, you can buy them and have plenty left over for other recipes! If you do happen to have everything in your kitchen that is listed below, check out how much cheaper than the horrible cheap brands this sauce is… and how much tastier! Do try and use good quality mayonnaise and ketchup though, your sauce will suffer without it.

It doesn’t have to stop with a prawn cocktail or seafood salad though, I like to have this stuff as a dip for chips, on the side with a plate of home made battered cod, as a home made chicken nugget dip.. the list is endless! Make a batch, pop some in a sterilised jar and pop it in the fridge, I bet you find uses for it all within a week!

INGREDIENTS

  • 4 tablespoons good quality mayonnaise
  • 2 tablespoons good quality tomato ketchup
  • 1 teaspoon Dijon or wholegrain mustard
  • 1/2 teaspoon sweet smoked paprika
  • Juice of 1/2 a lemon

METHOD

  1. One step and one step only, add all the ingredients together in a small bowl, mix until well blended and chill in the fridge until needed!
Categories: Meat Dishes, Sauces & Gravies | Tags: , , , , , | Leave a comment

Sausage & Chorizo Roll

Sausage & Chorizo Roll - perfect hot or cold!

Sausage & Chorizo Roll – perfect hot or cold!

This is a simple dish that tastes amazing when served up with some lovely roast vegetables and a nice red wine gravy.  It’s a take on the  classic british sausage roll with a touch of class to it, helped along by the chorizo, mushroom and apple stuffing.  Delicious hot or cold this is definitely one dish that will please everybody!

As always I have used a sweet smoked chorizo here, but if you like a kick, then feel free to use spicy if you prefer.  The mushrooms are fine if they are normal white ones, but chestnut are a little nicer in my opinion, if you want a really pungent mushroom flavour then consider using porcini mushrooms. As with any dish using sausages, make sure you have at least 70% pork in there. As for the cheese, well that’s up to you too, I use a smoked cheese, because I like the flavour, but that doesn’t mean you have to! Try different combinations and flavours until you find what you like!

Oh, one more thing, don’t waste time making pastry, shop bought puff pastry is just as good and far less time consuming!

INGREDIENTS

  • Packet of puff pastry
  • 250g pork sausage meat
  • 100g chopped chorizo
  • 100g chopped mushrooms
  • 50g chopped apple
  • 1 celery stick, chopped finely
  • 1 clove garlic, chopped finely
  • 1/2 teaspoon Liquid Smoke
  • 2-3 slices smoked cheese
  • 5-7 sage leaves, chopped finely
  • 1 egg, mixed
  • 1 tablespoon extra virgin olive oil

METHOD

  1. Preheat your oven to 200C/180C Fan/Gas Mark 5.
  2. In a large non stick frying pan heat the oil on a medium heat and add the celery and garlic, followed a minute later by the chorizo, Liquid Smoke, apple and mushrooms.  Stir every 30 seconds or so and add the sage leaves. Take off the heat after about 5 minutes, when everything is soft and well cooked and leave to one side.
  3. Prepare your pastry – if it’s in a block, then roll it out until only 3-4mm thick and in a rectagular shape. If the pastry is ready rolled, all the better because you don’t have to do anything! Lay it out on a lightly floured work surface and move on to the next stage.
  4. Take your packet of sausage meat and cut it in half. Take the first half and flatten it until it is a long rectangular shape, roughly 2-3 inches wide and 6-7 inches long. Place the sausage meat rectangle into the centre of the pastry.
  5. Next take your fried mixture and spoon it generously on top of the sausage meat layer you just placed on the pastry. On top of this, lay all of your cheese followed by the other half of the sausage meat, in the same rectangle shape as the bottom piece. Then, brushing the edge with egg, fold the sides of the pastry up and over, making a sausage roll shape, press the far ends down firmly and place the whole thing, seam side down (so basically what WAS the top should now be the bottom) onto a greased baking tray before brushing all over with more egg mixture and slicing 3 or 4 times in the top to allow steam to escape during cooking.
  6. Pop the tray into the oven and allow to bake for about 35-45 minutes until the pastry is golden brown all over. Remove from the oven and allow to rest for 5 minutes before cutting into thick slices and serving.
Categories: British Dishes, Meat Dishes, Pork Dishes | Tags: , , , , | Leave a comment

Toad In The Hole

Toad In The Hole - the ultimate British comfort food

Toad In The Hole – the ultimate British comfort food

Who doesn’t love a good old fashioned Toad in the Hole, cooked together with creamy mashed potato and a good onion gravy?  It’s the ultimate comfort food, admit it! In this recipe I use a herby yorkshire mix, and plain pork sausages, though you can easily leave out the mustard and herbs and if you want to use different sausages, that’s entirely up to you!  It is a good idea to check with your butcher when buying the sausages to ask what the pork content is, anything less than 70% is not a good sausage, if buying from a supermarket, it will tell you the amount of pork used in the sausage in the ingredients list on the back of the packet. I’ve also included my own recipe for a good onion gravy.

INGREDIENTS

  • 285ml milk
  • 115g plain flour
  • Pinch of salt
  • 3 eggs
  • ½ teaspoon mustard powder
  • 3 thyme sprigs, leaves stripped and chopped
  • 1 rosemary sprig, leaves stripped and chopped
  • 8 pork sausages
  • 2 tablespoons sunflower oil
  • 2 medium onions, peeled and sliced
  • 1 teaspoon soft brown sugar
  • 500ml beef stock

METHOD

  1. Preheat your oven to 220C/200C Fan/Gas Mark 7
  2. Firstly make your yorkshire pudding batter by tipping the flour into a large mixing bowl and stirring in the mustard powder and a good pinch of salt. Make a well in the centre of the dry mixture and crack in the eggs and a dribble of the milk.
  3. Stir with a wooden spoon, gradually incorporating more and more of the flour, until you have a smooth batter in the well. Add more of the milk and continue stirring until all the milk and flour has been mixed together and is a smooth lump-free batter the consistency of double cream. Tip the batter back into the jug you had your milk in and stir in the chopped thyme and rosemary leaves before leaving to stand either in the fridge or in a cool place for 15 minutes.
  4. Use a sharp knife or a pair of kitchen scissors to cut the links between the sausages if there are any, then throw them into a 20 x 30cm roasting tin.  Add 1 tablespoon of the oil, shaking the tin and coating both the sausages and the base of the tin thoroughly, then roast in the oven for 15 mins.
  5. When the sausages are nicely browned, remove the hot tray carefully from the oven, and quickly pour in the batter.  It will sizzle and bubble a little when it first hits the hot fat but that is exactly what we want here, if it doesn’t do it, then something isn’t right!  Put the tin back into the oven, and bake for 30-40 mins until the batter is cooked through, well risen, golden and crisp. If you poke the tip of a knife into the batter in the middle of the tray it should be set, not sticky or runny, if it is, pop it back in for a while with some tin foil over the top to prevent burning.
  6. While the tin is in the oven use the time to make your gravy, to do this, soften the onions with the remaining tablespoon of oil in a large non stick frying pan on a medium/low heat for about 15 mins, stirring often, until they are golden brown.  Sprinkle in the sugar and cook for another 5 mins. Add a tablespoon of plain flour, then simmer, stirring constantly for 2 mins, so the onions are well coated and there is no dry flour left at all. Gradually pour in the stock a bit at a time, stirring well all the time to make a smooth sauce.
  7. Turn the heat up a little and allow the gravy to bubble and thicken for 4-5 mins, then season with salt and pepper to taste.
  8. Serve everything together with some creamy mashed potato for some ultimate comfort!
Categories: British Dishes, Dishes of the World, Meat Dishes, Pork Dishes | Tags: , , , , , | 1 Comment

Strozzapreti

Strozzapreti - made for choking priests

Strozzapreti – made for choking priests

If someone had told me about a year ago that one day I would be making my own pasta and that my whole family would love it I would have laughed at you until I fell over… I always thought that making your own pasta required a massive amount of skill and effort, needing mad crazy tools such as a pasta rolling machine and the like and requiring a ton of space to hang your pasta to dry like an edible indoor laundry but it’s absolutely not! You don’t even need a bowl! Just your ingredients, a bit of time and a rolling pin!

Strozzapreti is a great place to start making your own pasta because it is ridiculously easy to make and form into pieces and when ready, it only take 2-3 minutes to cook.  It tastes great with most sauces and everybody can have a go making it.

The name Strozzapreti is a funny one, it means “priest choker” in Italian and the legends are many, my favourite one though is that in times gone by, the Catholic Church owned much unused land which they used to rent out to families in exchange for food cooked by the wives of the men who worked on the land. The husbands would be so angered by these corruptible and greedy priests that they would wish them to choke whist stuffing their faces with their wives food which in this instance was quick and easy to make for them, hence the name priest choker.  Another is that gluttonous priests would be so enamoured by this type of pasta that they would literally stuff their faces with it, choking themselves, sometimes to death! Geesh, I know I have a good appetite, but please!

Anyway, this pasta is a little different from most in that it isn’t made just with flour, eggs and salt. I actually replace most of the eggs with chopped tomatoes and their juices which give the pasta a lovely flavour.  Of course you can make Strozzapreti with eggs but I prefer it this way. Try using ’00 flour instead of plain, it’s made with a finer grain specifically for pastas.

This recipe gives you a heck of a lot of pasta, 6-8 servings in fact and be warned… it is VERY filling, so if you want to freeze some for another day, then do it in a ball and defrost it when you want to make more.

INGREDIENTS

  • 500g ’00 flour
  • 1 large egg
  • 3 large tinned plum tomatoes and their juices, finely chopped
  • Salt to taste

METHOD

  1. Here comes the fun part… Begin by putting a large pan of salted water on the boil.
  2. Tip the four onto your work surface and make a well in the middle, kind of like a flour volcano on your kitchen worktop.
  3. Pour the egg and tomatoes into the  well and slowly start to bring it all together until you have a dough, much like a bread dough.  You might find it becomes either a bit dry or wet, in which case you either add a bit more tomato juice or a bit more flour depending on which it is.
  4. Take about 1/4 of the dough and place it onto a lightly floured surface. Place a cloth over the remaining pasta dough to prevent it drying out while you work.
  5. Roll the dough you have on your work surface until it is about 3-5mm thick. Them using a sharp knife, cut it into strips about 3/4 inches wide.
  6. Take a strip of pasta and using your thumb and forefinger, pinch it together until you can roll it, sort of like a sausage, this will form a long twisted tubes which you then need to cut into 2 inch pieces. Don’t worry about being precise, it’s not about maths!
  7. Place your cut pasta onto a floured board so that none of the pieces are touching, and when you have as much pasta as you need ready (a board full feeds 2 of us happily), tip it gently into the boiling water.
  8. Give the pasta a good but gentle stir straight after it all goes into the water to prevent it from sticking together.
  9. Once the pasta floats to the top of the surface, give it another minutes and add it to whichever sauce you are using (I use my Crazy Simple Rosemary & Garlic Pasta Sauce) along with a splash or three of the starchy pasta water.
  10. Serve in the pan with crusty bread and salad.
Categories: Italian Dishes, Meat Dishes, Pizza & Pasta, Vegetarian Dishes | Tags: , , , , , | Leave a comment

Crazy Simple Rosemary & Garlic Pasta Sauce

I love a basic bowl of pasta, it’s the one thing that if I am starving but can’t be bothered to spend ages preparing and cooking a meal that I can throw together and eat knowing that I’ll be satisfied. It doesn’t matter if you are a vegetarian or a meat eater there is a pasta sauce out there that will suit everyone, including this one which can be made with with, or without meat. You can also substitute the oil for a large chunk of butter but you’re talking heart attack city! Stir it into spaghetti or a bowl of my home made Strozzapreti for a wicked fast, wonderful and filling supper dish.

INGREDIENTS

  • 6 tablespoons extra virgin olive oil
  • 2 cloves garlic
  • large sprig of fresh rosemary
  • 2 tablespoons grated parmesan
  • 100g Chorizo (either spicy or smoky is fine or you can leave it out completely)

METHOD

  1. Chop your garlic finely and remove the leaves from the rosemary stalks and chop them.
  2. In a frying pan, heat the olive oil and add the garlic, rosemary and Chorizo if you are using. Stir fry for about 2 minutes then add the parmesan.
  3. Add your pasta and stir it all together.
  4. Serve with some crusty bread.
Categories: Italian Dishes, Light Lunch, Pizza & Pasta, Sauces & Gravies | Tags: , , , , | Leave a comment

Herby Focaccia

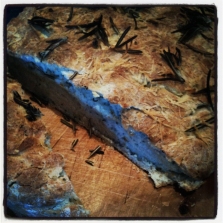
Herby Focaccia - made for mopping up sauce!

Herby Focaccia – made for mopping up sauce!

Focaccia is an Italian flat-ish bread, traditionally baked and covered in salt, fresh rosemary and olive oil.  This version isn’t technically Focaccia because the herbs are inside the bread instead of one top and the dough is much drier and solid than traditional Focaccia would be.

What you have here though is a lovely alternative to garlic bread, thick pizza crust like slices with tons of lovely herbs inside waiting to explode in your mouth. It’s delicious for mopping up pasta sauce or simply dipping into olive oil, balsamic vinegar or pesto as a snack or starter.

It’s also ridiculously easy to make and only takes 15 minutes to cook in the oven because of it’s flatness. You can add as much or as little topping to it as you choose and spice it up with flavours such as chilli or sliced tomato or chopped garlic and parsley, but I tend to go for the regular olive oil, rosemary and some parmesan and grated mozzerella as well for that finishing touch.

INGREDIENTS

  • 345g strong bread flour
  • 1 teaspoon salt
  • 1 teaspoon white sugar
  • 1 tablespoon active dry yeast (this is the stuff you don’t need to activate in water first)
  • 1 teaspoon garlic powder
  • 1 teaspoon dried oregano
  • 1 teaspoon dried thyme
  • 1/2 teaspoon dried basil
  • Pinch of ground black pepper
  • 1 tablespoon vegetable oil
  • 235 ml lukewarm water (if you can put your finger in it and not feel the temperature then it’s perfect)
  • 2 tablespoons olive oil
  • 1 tablespoon grated Parmesan cheese
  • 100g grated mozzarella

METHOD

  1. Sift the flour into a large mixing bowl.
  2. Add the salt, yeast, garlic powder, oregano, thyme, basil and black pepper and stir.
  3. Add the water and vegetable oil and start to scrape together into a dough using a knife before getting your hands in there and forming the final bread dough.
  4. Place the dough onto a lightly floured surface and knead until smooth and elastic, this basically means if you stretch it, it bounces back into place without breaking., you need to knead the dough for at least 10 minutes to get the gluten going. Push the top of the dough away from you before pulling it back on top and repeating. Yes, you’re going to get muscles.
  5. Clean the bowl you mixed the dough in earlier and lightly coat it with oil. put the kneaded ball of dough inside and cover it with a damp teatowel or cling film and leave it to rise somewhere warm for 30-45 minutes. I place mine next to a hot radiator or near a sunny windowsill or just inside my loft if it’s warm out (it gets really warm up there in the summer), or in a conservatory or next to a hot oven. This is because I don’t actually have an airing cupboard, but if you do and it’s warm, then pop it in there!
  6. About 10 minutes before you go to fetch the bread dough, preheat the oven to 230C/210C Fan/Gas Mark 8.
  7. Check your dough, if it has risen to double it’s size it’s ready. bring it back to your work surface and punch it back down into the bowl. Turn it out onto an oiled baking sheet and flatten down it to about 1/2 – 1 inch in a rectangle shape.
  8. Using your fingers, push the top of the dough down to make dimples, then brush the top of the dough with the olive oil and sprinkle the cheeses over the top and drop a few springs of fresh rosemary here and there.
  9. Bake the bread in the oven for about 15 minutes, or until the top has turned golden brown, check that it is cooked through by lifting the bread and gently tapping the bottom, if it sounds hollow then it’s done.
  10. Serve warm with a bowl of pasta and use to mop up any left over sauce.
Categories: Bread | Tags: , , , , , | Leave a comment

Create a free website or blog at WordPress.com.